I would like to thank all of the concerned blog watchers for their interest in this project. I have received emails wanting to know the reason why there have been no new updates to the blog. This is the latest status of the repaint for all of you concerned blog watchers.
Yesterday I spoke with Mike R. at his Maaco shop in Albany, NY. Mike wanted to install a new windshield before final painting to make sure the body work on the A-pillars did not change the windshield opening.
The windshield that was delivered by Harmon AutoGlass was mislabeled and a replacement took two weeks to be delivered. When they attempted to install the correct windshield it was discovered that the bodywork done to the left A-pillar caused the new windshield to be a bit too tight. The windshield went in with difficulty and the rubber gasket in the lower left corner was distorted.
The windshield was removed and taken back to the Harmon shop where the lower left corner was ground down a bit to make it less tight. It did not get back to the Maaco shop until the week of December 8.
The windshield was installed with no problem and removed. The truck was then given a second coat of base color, a coat of tinted clear and the final coat of clearcoat.
Last week upstate NY and New England endured a pretty serious ice storm that caused power outages throughout the region and Mike's three shops were without power for five days. Even though we live sixty miles north of Albany in a colder area, we were OK. We have a Guardian standby generator that runs on LP gas just in case we have a power failure. We didn't need it....this time!
The work that remains is to paint the small pieces such as the glove box door, instrument bezel, door access panels, ashtray and grill. The body has to be wet-sanded and buffed. The set of wheels that Fred C. of Rhode Island supplied for the project have to be sandblasted and painted with black epoxy paint.
This is the beginning of the busy season for body shops in the region because of snow and ice-related accidents. My truck has always been a fill-in project for the shop and has never been a priority for neither Mike nor myself. With that in mind, I don't expect to see the truck again until January or possibly later.
Now you know.
In the meantime, I invite you to check out some photos of my cute grandsons.
Email me: Ron B.
Friday, December 19, 2008
Friday, December 5, 2008
Hubcaps
I decided a long time ago that I didn't want to put alloy wheels on the truck. You may have a different opinion but I don't like the look of alloy wheels on older vehicles.
It is not a matter of cost. Having the stock wheels refinished along with the cost of hubcaps or wheelcovers in great condition is actually more expensive then even new alloy wheels! Am I crazy or what?
So, with that in mind....I have a great deal for some lucky guy.... or gal!
About a year ago I was the winner of an eBay auction for 4 NOS (New Old Stock) FORD Hubcaps to fit 13" wheels. That was the good news. The bad news was that I own a pickup with 14" wheels!
I do not have a use for them and it is time to make room on my shelves. I do not intend to make any money on these hubcaps. I would simply like to get back some of what I paid for them.
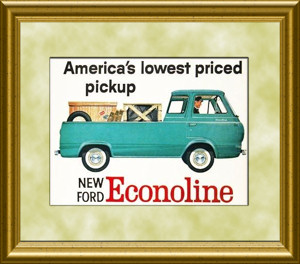
These hubcaps will fit 13" wheels that were used on Ford vehicles, Falcons, Fairlanes, Econolines etcetera in the 1960's.
It is not a matter of cost. Having the stock wheels refinished along with the cost of hubcaps or wheelcovers in great condition is actually more expensive then even new alloy wheels! Am I crazy or what?
So, with that in mind....I have a great deal for some lucky guy.... or gal!
About a year ago I was the winner of an eBay auction for 4 NOS (New Old Stock) FORD Hubcaps to fit 13" wheels. That was the good news. The bad news was that I own a pickup with 14" wheels!
I do not have a use for them and it is time to make room on my shelves. I do not intend to make any money on these hubcaps. I would simply like to get back some of what I paid for them.
These hubcaps will fit 13" wheels that were used on Ford vehicles, Falcons, Fairlanes, Econolines etcetera in the 1960's.
HONESTY IS THE BEST POLICY


The eBay seller stated these hubcaps were NOS. They were not. Pretty close in quality to NOS but not perfect.
These hubcaps were obviously installed at one time probably for a very short period of time. It is possible that they were used on a display truck in a showroom. But I doubt that they have seen any road usage at all. They are too clean. They were probably removed and put on a shelf and forgotten about for a long time.

As I previously stated, they are not perfect. There is some very light scuffing and a small amount of very light scratches and a couple very small dents that can easily be pushed out. I would recommend that they be repaired by someone who can do "paintless body repair," Dent Doctor for instance.
I paid $175 for the hubcaps and I would like to get $150 for them. PayPal is OK. For that price you will get USPS Priority Mail shipping with delivery confirmation. If you don't like them, send them back for a refund minus the shipping costs. How's that for a deal?
By the way, if you know of anyone who has 4 hubcaps of the same style in great conditon that will fit 14' wheels let me know. I have a few dozen in my possession but none look as good as these.

You can see larger versions of the photos by clicking here
If you are interested in purchasing these hubcaps please contact me
ENJOY THE RIDE !
Monday, October 13, 2008
Refinishing Parts
Most of the components that were removed prior to body and paint work are now restored. Parts were washed, media-blasted, primed and painted using Dupli-Color lacquers and Engine Enamels.
Some parts such as the defroster nozzles required different techniques. When the nozzles were removed from the vehicle they were just tossed in a box with other parts. After a couple years they got deformed. Fortunately, they are made out of a cheap cardboard material and were easy to repair.
 I soaked them in warm water for a few minutes to soften the material and used thin strips of wood cut to the size of the defroster outlets and placed them into the slots as the cardboard dried. Perfect!
Then, I gave them a quick sandblasting to clean them. I noticed that there were a couple rips (green arrows) in the material and I used cyanoacrylate adhesive to repair the rips. I then saturated the nozzles with the cyanoacrylate to strengthen them. It soaked right in. If you attempt this method make sure that you use hand protection such as rubber or nitrile gloves.

Cyanoacrylate adhesive is sold under these names: Krazy Glue, Super Glue, instant glue and others.
All of the parts including the nozzles were finished with lacquer prime and engine enamel.


There are dozens of parts that have been finished just the those above. Now, where is that body so that I can start putting it back together!
As always, you can see larger versions of these photos at my Flickr page. Just be sure to hit the "Back" button on your favorite browser to return to this blog.
Email me: Ron B.
Friday, October 3, 2008
Body Work - Again!
"Why Maaco?" Some might be asking that question and this is the simple answer....no other shop would take on the restoration work. I can assure you that this was definitely not a $200 special!
Although the body did not have any rusted-through (body rot) areas other than the tailgate there were trim holes that I wanted filled with weld and many small dents. Mike R, the owner of the Maaco Shop in Albany, NY came to my house to appraise the work needed and decided that he would take the job if I was not in a rush. I wasn't.
 Body shop owners would rather replace a panel or a door, paint it and move onto the next job. It's quick and makes money quickly. Working body panels with hammers and dollies, smoothing and shrinking steel takes a lot of time and experience.
Mike employed an oldtimer, Patrick, who had experience working with the soft steel common to 1960's vehicles. He could work on the truck between other jobs. Patrick told me whenever I visited the shop how much he enjoyed working on the truck!
Over the next two years Patrick worked on the truck and put about 200 hours into it. Mike charged $45 per hour. That came out to about $9,000 just for the labor. Add in the cost of materials and paint and the cost was well over my original budget.

Photo above....Mike is straightening the equalizer bar bracket that was damaged in the shop. Notice how the bed has been covered and masked to protect the spray-in Rhinolining. Work was needed to correct the problem of the tailgate rubbing on the edge of the bed. That is the reason for the primer.
The truck was delivered back to me and if you have been following this blog you will remember that I had it up on jackstands for quite some time in my garage. I removed the axles and springs over a period of a few months and had opportunities to closely inspect the bodywork. There were a few problems that needed to be addressed.

Photo above.... The holes for the F-O-R-D letters were mistakingly filled in by Patrick. I spent hours measuring and marking the locations to drill new holes. I miscalculated! I drilled the holes exactly 1/2 inch too low and that mistake had to be fixed. In the future I will grind the studs off the letters and use adhesive to mount them.
Below is the original factory seam on the left A-pillar shown with a crack that was painted over. The green arrows point to the crack.

Under the paint is the factory seam. Apparently, after it was repaired, it cracked again before it was painted.
 The fix was to weld a panel onto the backside. Hopefully, that will fix the problem permanently.

The same problem developed with the right side A-Pillar and the same fix was employed.


 The two photos below show paint cracks that are actually hiding a much deeper problem. The joint between the two pieces of steel was very weak and had to be reinforced by welding a piece of steel to the panels from the backside.

 The photo below shows the repaired seam.
 The left rear corner did not have the same problem as the right side did. The flexible seam sealer did what it was supposed to do. It flexed which caused the paint to crack. It is a problem that I will have to live with.
 The entire exterior and cab interior was scuffed to accept the new paint. It will be painted with the same color, 2006-7 Chevrolet Corvette, Monterey Red Metallic Tintcoat (80U), which is a three stage color. After the base coat is applied, a colored clearcoat is applied before the the final clearcoat.
I am supposed to get the truck back within a couple weeks. Yippee!
As always, you can see larger versions of these photos at my Flickr page. Just be sure to hit the "Back" button on your favorite browser to return to this blog.
Email me: Ron B.
Although the body did not have any rusted-through (body rot) areas other than the tailgate there were trim holes that I wanted filled with weld and many small dents. Mike R, the owner of the Maaco Shop in Albany, NY came to my house to appraise the work needed and decided that he would take the job if I was not in a rush. I wasn't.
 Body shop owners would rather replace a panel or a door, paint it and move onto the next job. It's quick and makes money quickly. Working body panels with hammers and dollies, smoothing and shrinking steel takes a lot of time and experience.
Mike employed an oldtimer, Patrick, who had experience working with the soft steel common to 1960's vehicles. He could work on the truck between other jobs. Patrick told me whenever I visited the shop how much he enjoyed working on the truck!
Over the next two years Patrick worked on the truck and put about 200 hours into it. Mike charged $45 per hour. That came out to about $9,000 just for the labor. Add in the cost of materials and paint and the cost was well over my original budget.

Photo above....Mike is straightening the equalizer bar bracket that was damaged in the shop. Notice how the bed has been covered and masked to protect the spray-in Rhinolining. Work was needed to correct the problem of the tailgate rubbing on the edge of the bed. That is the reason for the primer.
The truck was delivered back to me and if you have been following this blog you will remember that I had it up on jackstands for quite some time in my garage. I removed the axles and springs over a period of a few months and had opportunities to closely inspect the bodywork. There were a few problems that needed to be addressed.

Photo above.... The holes for the F-O-R-D letters were mistakingly filled in by Patrick. I spent hours measuring and marking the locations to drill new holes. I miscalculated! I drilled the holes exactly 1/2 inch too low and that mistake had to be fixed. In the future I will grind the studs off the letters and use adhesive to mount them.
Below is the original factory seam on the left A-pillar shown with a crack that was painted over. The green arrows point to the crack.
Under the paint is the factory seam. Apparently, after it was repaired, it cracked again before it was painted.
 The fix was to weld a panel onto the backside. Hopefully, that will fix the problem permanently.
The same problem developed with the right side A-Pillar and the same fix was employed.


 The two photos below show paint cracks that are actually hiding a much deeper problem. The joint between the two pieces of steel was very weak and had to be reinforced by welding a piece of steel to the panels from the backside.
 The left rear corner did not have the same problem as the right side did. The flexible seam sealer did what it was supposed to do. It flexed which caused the paint to crack. It is a problem that I will have to live with.
 The entire exterior and cab interior was scuffed to accept the new paint. It will be painted with the same color, 2006-7 Chevrolet Corvette, Monterey Red Metallic Tintcoat (80U), which is a three stage color. After the base coat is applied, a colored clearcoat is applied before the the final clearcoat.
I am supposed to get the truck back within a couple weeks. Yippee!
As always, you can see larger versions of these photos at my Flickr page. Just be sure to hit the "Back" button on your favorite browser to return to this blog.
Email me: Ron B.
Wednesday, October 1, 2008
Glass Polishing
Polishing glass is not a quick job. You need the right tools,supplies, patience and a lot of time!
The photo below is of a piece of door glass for the 1965 Ford Econoline. It is quite difficult to take a photo that shows the clarity of the glass after it has been polished. You will have to take my word for the results. It looks pretty good! This single piece of glass took about two hours and about five dollars worth of supplies.

Eastwood sells a kit for polishing glass that includes the felt pad that you see below. It is made to be mounted in a drill. Eastwood claims that if you can't feel a scratch with a fingernail, it can be polished out with this kit.


Included in the kit is Rhodite Glass Polishing Compound. Rhodite is a natural occurring alloy of Gold and Rhodium. This Rhodite is extremely finely ground and mixed with water to make a paste.
 Using the polishing pad in a drill is not fun. The drill is hard to hold and control because the pad wants to walk around the glass. The problem with the Eastwood pad is that it comes with a smooth shaft and I wanted to use my Porter-Cable Random Orbital Polisher.
 I had a machinist, Josh W. of Kingsbury, NY create the adapter that is pictured below.

Now the Eastwood polishing pad can be used in my polisher. Much better!


Below is a 5-inch 3M Hookit pad that fits most polishing machines.

The loops on the pad and the hooks on the disks are similar to and work like Velcro.

3M makes films to polish glass. They range from coarse to fine. I used medium and fine to remove fine scratches in the glass. The main problem with polishing auto/truck glass is that except for the windshield, the glass is tempered. Tempered glass is extremely hard and it takes a lot of work and a lot of these films to get the desired results. It gets expensive.


While it is possible to polish glass including the curved glass in the corners of the pickup truck, it is a lot of work. Would it be better to send glass out to a shop to have it polished? Perhaps. But I am a glutton for punishment and there is a certain sense of pride attached to each and every part that I personally restore!
As always, you can see larger versions of these photos at my Flickr page. Just be sure to hit the "Back" button on your favorite browser to return to this blog.
Email me: Ron B.
The photo below is of a piece of door glass for the 1965 Ford Econoline. It is quite difficult to take a photo that shows the clarity of the glass after it has been polished. You will have to take my word for the results. It looks pretty good! This single piece of glass took about two hours and about five dollars worth of supplies.

Eastwood sells a kit for polishing glass that includes the felt pad that you see below. It is made to be mounted in a drill. Eastwood claims that if you can't feel a scratch with a fingernail, it can be polished out with this kit.


Included in the kit is Rhodite Glass Polishing Compound. Rhodite is a natural occurring alloy of Gold and Rhodium. This Rhodite is extremely finely ground and mixed with water to make a paste.
 Using the polishing pad in a drill is not fun. The drill is hard to hold and control because the pad wants to walk around the glass. The problem with the Eastwood pad is that it comes with a smooth shaft and I wanted to use my Porter-Cable Random Orbital Polisher.
 I had a machinist, Josh W. of Kingsbury, NY create the adapter that is pictured below.
Now the Eastwood polishing pad can be used in my polisher. Much better!


Below is a 5-inch 3M Hookit pad that fits most polishing machines.

The loops on the pad and the hooks on the disks are similar to and work like Velcro.

3M makes films to polish glass. They range from coarse to fine. I used medium and fine to remove fine scratches in the glass. The main problem with polishing auto/truck glass is that except for the windshield, the glass is tempered. Tempered glass is extremely hard and it takes a lot of work and a lot of these films to get the desired results. It gets expensive.


While it is possible to polish glass including the curved glass in the corners of the pickup truck, it is a lot of work. Would it be better to send glass out to a shop to have it polished? Perhaps. But I am a glutton for punishment and there is a certain sense of pride attached to each and every part that I personally restore!
As always, you can see larger versions of these photos at my Flickr page. Just be sure to hit the "Back" button on your favorite browser to return to this blog.
Email me: Ron B.
Enjoy the Ride !
Friday, September 5, 2008
Another Vent Window Update
What looks like a quick task actually took a couple hours to complete.
I reinstalled the pieces of stainless steel that protect the rear frame sections which are mounted to the division bars. In normal use, the vent window handles scratch this component which protects the factory black paint. Now it will protect the new chrome.

Rather than polish the stainless back to its original state I gave it a brushed finish to compliment the chrome.
As always, you can see larger versions of these photos at my Flickr page. Just be sure to hit the "Back" button on your favorite browser to return to this blog.
Email me: Ron B.
Enjoy the Ride !
Tuesday, September 2, 2008
Vent Window Update
Instead of refinishing the vent window assemblies in the original black paint I decided to have everything that is visible chrome plated. Below are the vent window frames with the glass installed.
The glass was polished using a Porter-Cable random-orbital polisher and a felt pad with rhodite abrasive.
 Below are the original vent window handles after being rechromed.

All of the newly chrome plated vent window components for the left window are shown below. The mounting frame was chrome plated because it was easier to plate the entire assembly rather than just the attached pivot.
The steel components were chrome plated by Tri-City Plating in Elizabethton, TN
The handles and pivot sockets were plated by R & D Finishing also in Elizabethton, TN

The next project is to reassemble these vent window components with the new division bars and rubber pieces.
As always, you can see larger versions of these photos at my Flickr page. Just be sure to hit the "Back" button on your favorite browser to return to this blog.
Email me: Ron B.
The glass was polished using a Porter-Cable random-orbital polisher and a felt pad with rhodite abrasive.
 Below are the original vent window handles after being rechromed.
All of the newly chrome plated vent window components for the left window are shown below. The mounting frame was chrome plated because it was easier to plate the entire assembly rather than just the attached pivot.
The steel components were chrome plated by Tri-City Plating in Elizabethton, TN
The handles and pivot sockets were plated by R & D Finishing also in Elizabethton, TN

The next project is to reassemble these vent window components with the new division bars and rubber pieces.
As always, you can see larger versions of these photos at my Flickr page. Just be sure to hit the "Back" button on your favorite browser to return to this blog.
Email me: Ron B.
Enjoy the Ride !
Sunday, August 31, 2008
Transmission, Shift Arms and Trunnions
The 3-speed manual transmission was rebuilt using new bearings, seals and gaskets. The blocking rings and synchronizers were in good shape so they did not need to be replaced. Gary N. of Tri-County Motor Parts located in Glens Falls, New York assisted in the rebuild. He has many years of experience working on engines, transmissions and rear axles and currently is building engines for dirt track racing and muscle cars.

The original shift arms and trunnions were very worn and had developed excessive free-play. My favorite machine shop owner/operator, Josh W. of Kingsbury, New York and I came up with a simple solution.

Below are the trunnions before being turned down. Notice the wear.

Rather than fabricating from scratch it was determined that the trunnions could be turned down a minimal amount to make them true. Bronze bushings were pressed into the shift arms completing the upgrade.

All of the components were sandblasted and finished with Dupli-Color Engine Enamel.
As always, you can see larger versions of these photos at my Flickr page. Just be sure to hit the "Back" button on your favorite browser to return to this blog.
Email me: Ron B.
The original shift arms and trunnions were very worn and had developed excessive free-play. My favorite machine shop owner/operator, Josh W. of Kingsbury, New York and I came up with a simple solution.
Below are the trunnions before being turned down. Notice the wear.

Rather than fabricating from scratch it was determined that the trunnions could be turned down a minimal amount to make them true. Bronze bushings were pressed into the shift arms completing the upgrade.
All of the components were sandblasted and finished with Dupli-Color Engine Enamel.
As always, you can see larger versions of these photos at my Flickr page. Just be sure to hit the "Back" button on your favorite browser to return to this blog.
Email me: Ron B.
Enjoy the Ride !
Friday, August 29, 2008
Clutch Linkage
Trying to take all possible free-play and slop out of the clutch linkage made it necessary to improve on every component designed by Ford. After consulting with machine shop owner Josh W. of Kingsbury, NY it was determined that it wouldn't be that difficult!
Other improvements to the clutch pedal assembly were previously described in an earlier blog entry.
All repaired and new items were sandblasted and finished with Dupli-Color Engine Enamel.
Below is a photo that shows the old and new clutch link rods. The old rod was fabricated from a 5/16" steel rod. The new rod was made with 3/8" steel which is much stiffer with little weight gain.
 Notice how the old rod has worn away where it was inserted in the clutch pedal assembly. It would probably would have lasted for many more years before failing but it was a cause of slop in the operation of the clutch. This would have been a good candidate for frequent lubrication.
This end was redesigned with a Heim joint which made it necessary to modify the clutch pedal assembly. That change will be show in a photo further down on this page.
 This is a view of the linkage rod where it connects to the equalizer bar, sometimes referred to a the "Z-bar." It too, was improved with the addition of a Heim joint.
 Below is a close view of the clutch pedal assembly where the linkage rod connects. The factory method had a hole bored to accept the rod. It was held in place with a split pin. The modification was to bore the hole out to accept a stud that was machined to fit the Heim Joint. The threads are long enough to accept a nylon lock nut.

 An overhead view of the Heim joint in place. Notice how the machined surface is long enough to accept Heim joint seals and washers.

The restored and improved equalizer bar is shown below. Notice how the original pins to mount the linkage were replaced with threaded studs to accept the new Heim joints.

This is the original equalizer bar chassis mount with a new stud. The new stud is identical to the factory design including the knurling on the stud as you can see in the photo just below.


Below is the restored mount complete with a new felt seal, plastic bushing and C-clip. Not seen in this photo is the small amount of Green Grease that was applied to the shaft.

A close view of one end of the equalizer bar. The original bore was destroyed when the bushing failed and the equalizer bar was being worn away by the mounting studs.
Originally Josh was planning to bore the shaft out, insert a repair sleeve and plug-weld it. A much simpler and elegant solution was to simply add material to the interior of the shaft with welding rod and machine the bore. Evidently, you can mount an eccentric item in a lathe and machine it.
Notice the new Heim joint mount which replaces the factory original.
 The equalizer bar with the clutch linkage rod is shown below.
 Below is the clutch pushrod. The factory original had a D-shaped hole at the end of the threaded portion that allowed length adjustment. The improved version uses a Heim joint. Josh machined a coupling to attach the new Heim joint to the threaded portion of the old push rod.

The three new Heim joints will be sealed against the elements with the seals shown below.

Shown below is the modified clutch pushrod mounted on the equalizer bar.

A closer view of the clutch pushrod temporarily mounted on the equalizer bar showing the seals in place. When mounted on the truck, the plain nut will be replaced with a nylon locknut.

As always, you can see larger versions of these photos at my Flickr page. Just be sure to hit the "Back" button on your favorite browser to return to this blog.
Email me: Ron B.
Other improvements to the clutch pedal assembly were previously described in an earlier blog entry.
All repaired and new items were sandblasted and finished with Dupli-Color Engine Enamel.
Below is a photo that shows the old and new clutch link rods. The old rod was fabricated from a 5/16" steel rod. The new rod was made with 3/8" steel which is much stiffer with little weight gain.
 Notice how the old rod has worn away where it was inserted in the clutch pedal assembly. It would probably would have lasted for many more years before failing but it was a cause of slop in the operation of the clutch. This would have been a good candidate for frequent lubrication.
This end was redesigned with a Heim joint which made it necessary to modify the clutch pedal assembly. That change will be show in a photo further down on this page.
 This is a view of the linkage rod where it connects to the equalizer bar, sometimes referred to a the "Z-bar." It too, was improved with the addition of a Heim joint.
 Below is a close view of the clutch pedal assembly where the linkage rod connects. The factory method had a hole bored to accept the rod. It was held in place with a split pin. The modification was to bore the hole out to accept a stud that was machined to fit the Heim Joint. The threads are long enough to accept a nylon lock nut.
 An overhead view of the Heim joint in place. Notice how the machined surface is long enough to accept Heim joint seals and washers.
The restored and improved equalizer bar is shown below. Notice how the original pins to mount the linkage were replaced with threaded studs to accept the new Heim joints.

This is the original equalizer bar chassis mount with a new stud. The new stud is identical to the factory design including the knurling on the stud as you can see in the photo just below.


Below is the restored mount complete with a new felt seal, plastic bushing and C-clip. Not seen in this photo is the small amount of Green Grease that was applied to the shaft.

A close view of one end of the equalizer bar. The original bore was destroyed when the bushing failed and the equalizer bar was being worn away by the mounting studs.
Originally Josh was planning to bore the shaft out, insert a repair sleeve and plug-weld it. A much simpler and elegant solution was to simply add material to the interior of the shaft with welding rod and machine the bore. Evidently, you can mount an eccentric item in a lathe and machine it.
Notice the new Heim joint mount which replaces the factory original.
 The equalizer bar with the clutch linkage rod is shown below.
 Below is the clutch pushrod. The factory original had a D-shaped hole at the end of the threaded portion that allowed length adjustment. The improved version uses a Heim joint. Josh machined a coupling to attach the new Heim joint to the threaded portion of the old push rod.
The three new Heim joints will be sealed against the elements with the seals shown below.

Shown below is the modified clutch pushrod mounted on the equalizer bar.

A closer view of the clutch pushrod temporarily mounted on the equalizer bar showing the seals in place. When mounted on the truck, the plain nut will be replaced with a nylon locknut.

As always, you can see larger versions of these photos at my Flickr page. Just be sure to hit the "Back" button on your favorite browser to return to this blog.
Email me: Ron B.
Enjoy the Ride !
Subscribe to:
Posts (Atom)